
As it is baking season I find it important that before anyone starts baking they know the basic techniques that will ensure a good cookie every time.
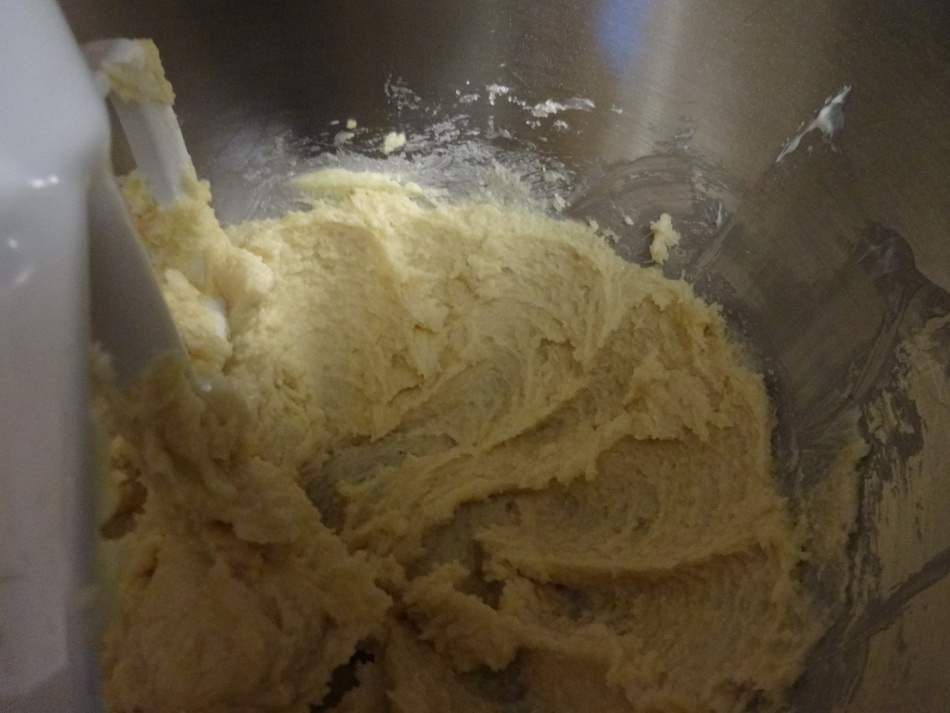
Most cookie recipes start with creaming butter and sugar. It is arguably one of the hardest parts of making a good cookie. Creaming refers to the combination of sugar and butter into a homogeneous mix with a fair amount of air. Your butter needs to be completely at room temperature to achieve a good cream, otherwise you will end up with chunks of unmixed butter in your cookie and sadness will ensue when they come out of the oven. As much as I love to make things without my mixer, it is really hard to get a good cream without the super-fast action of a stand or hand mixer. Normally a couple of minutes at a middle setting on any mixer will do the trick. After creaming, the butter should appear light and fluffy.
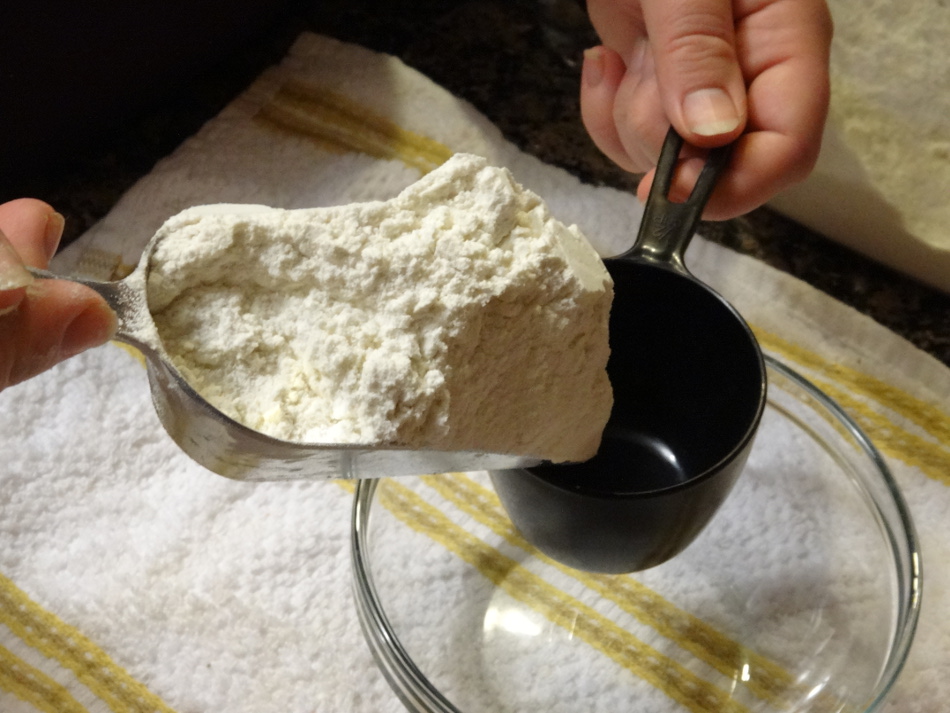
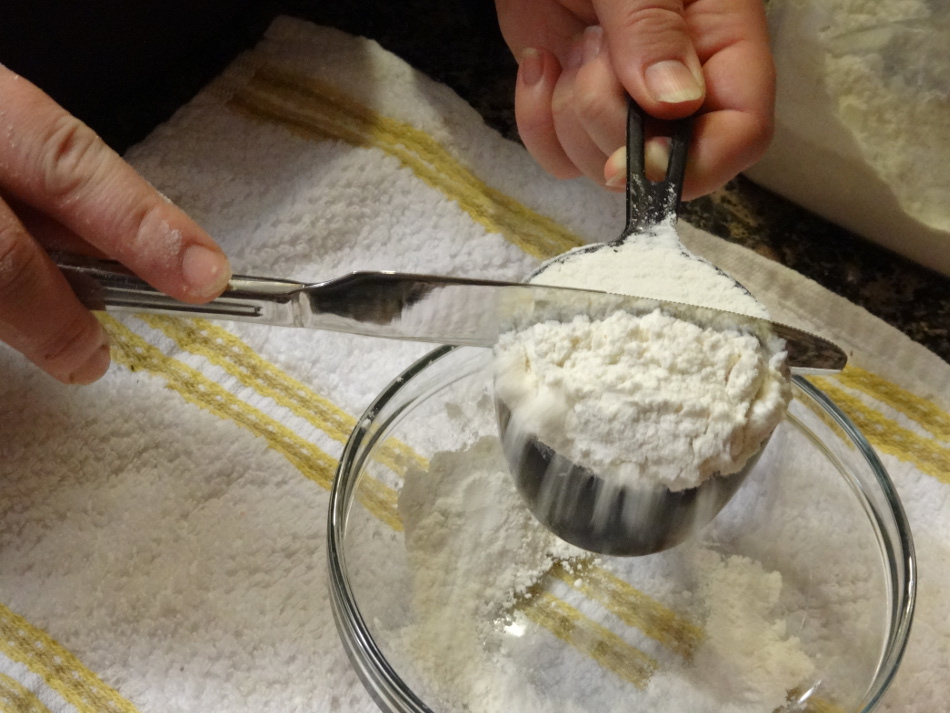
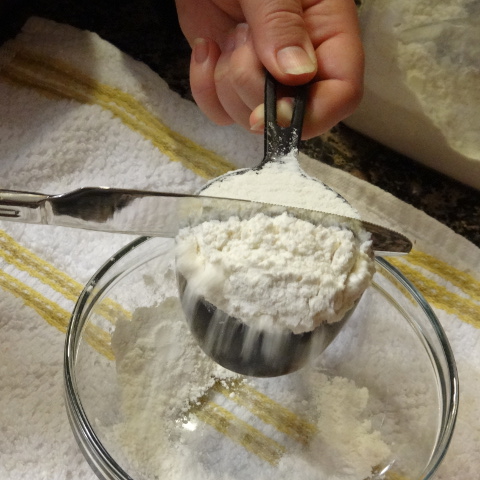
Measuring flour is another place where many people fail in making cookies. NEVER EVER EVER EVER EVER (get the point yet?) put your measuring cups into your flour to measure. EVER. I’m super cereal! When you put your measuring cup into your flour, there is a fair amount of compression occurring which means that cup of flour weighs more than it should. The best method for measuring flour is the scoop and swoop. Scoop flour into your measuring cup using a spoon or a dry goods scoop (this is a nice set of scoops) until there is a fair mound of flour above the rim on the measuring cup. Then swoop over the top with a butter knife. Don’t swoop too fast or else you will end up with flour left behind. If you end up with flour left behind above the rim, swoop again but be careful not to compress the flour in the cup.
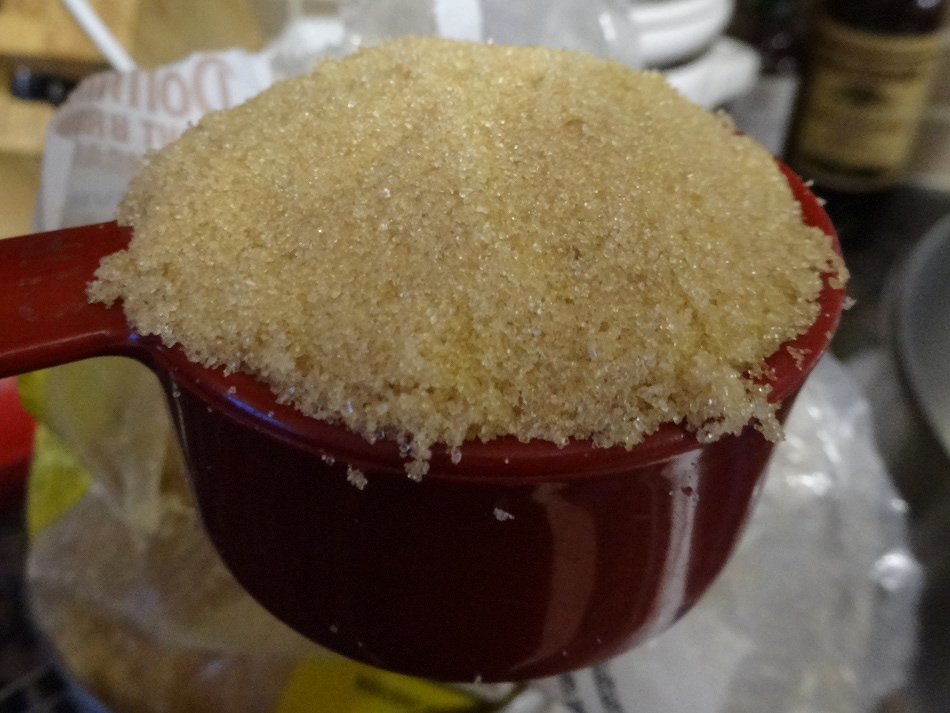
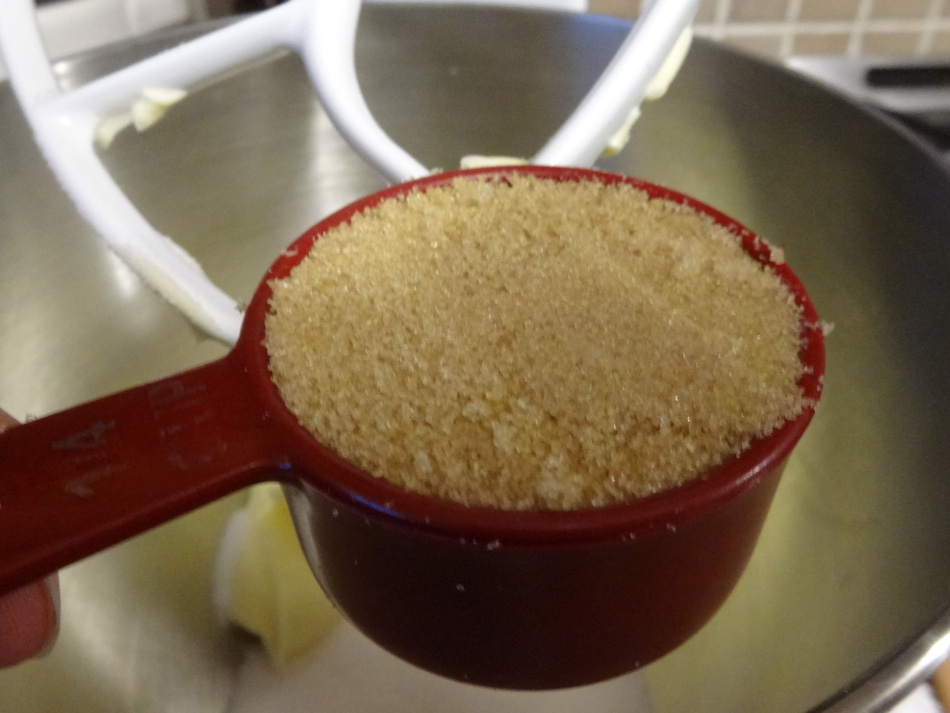
In contrast you should always pack brown sugar, as tightly as you possibly can. Press brown into your measuring cup with your fingers until it mounds above the rim. Using a sharp paring knife slice over the top to remove the excess.
Finally, let’s talk baking. No ovens, no matter how wonderful, have a completely equal distribution of heat. By the door the oven is a couple degrees cooler. In an older oven, where the seals may not be the best, it can be more than a couple degrees cooler. Additionally, the proximity to the heating element will affect the local temperature your cookies are experiencing. To reduce the chance that one half of your cookies will be on the crispy side while the others are barely done you have to rotate your cookies EVERY TIME YOU BAKE. Rotate front to back. Additionally, if you are baking on multiple racks, rotate the cookies on the high rack to the low rack. Avoid opening and closing the oven a lot but do open the oven about 1 minute before your cookies are supposed to be done and check. Are they looking golden brown at the bottom or do the centers still appear shiny and wet? If they are getting golden brown there is a good chance they are done, and leaving them the extra minute will lead to burnt cookies. If they still appear shiny let them go.
Once your cookies come out of the oven you may think your work is done. Think again. Do not keep your cookies on the sheets indefinitely. Those cookies are still cooking while they are on the hot cookie sheets! Don’t take them off immediately but after about 5 minutes take the cookies off the sheets and place them directly on a wire rack (put a dishrag under your rack so you don’t end up with counters covered in cookie crumbs). Only when your cookies are completely cool should they be removed from the rack and put on a plate. Warm cookies will stick together and will tear when you try to separate them.
These may not be the only places you can go wrong with a cookie but following these techniques every time will normally lead to a great cookie. If there are tricks you use that have improved your cookies please share them below!
